How to Create an Interactive PDF in InDesign
Interactive PDFs are a great way to seriously elevate your brand. Not only are they super impressive and professional, but they also show that you’re willing to go the extra mile for your readers by including helpful clickable and fillable features that most others (ahem… your competition) do not.
Interactive PDFs are great for ebooks, freebies, worksheets, checklists, proposals and presentations. Are you in the market for creating any of these things? If so, this article is for you!
What is an interactive PDF?
An interactive PDF is a PDF that allows you to click links and buttons, fill out text boxes, select bookmarks, check-off or select lists of items, and sign documents – all electronically.
I use interactive PDFs for any freebies I send out to my email list.
Interactive PDFs are not only super helpful for your audience, but they're actually not that difficult to make! All you need is a basic understanding of Adobe InDesign, and I’ll walk you through the rest.
Ready to take your Interactive PDF skills to the next level?
1 | Design your page(s) in InDesign as normal
In order to create an interactive PDF in InDesign, your InDesign document needs to be finished (or mostly finished) before you start adding interactive elements to it.
Essentially just design as usual. Once you’re finished with the overall design and layout of your InDesign document, you can turn it into an interactive PDF.
Easiest. First. Step. EVER.
2 | Turn on the Interactive PDF Workspace
In the top, right-hand side of the menu bar in InDesign you’ll see a button that says "Publish Online", a drop down menu that probably says Essentials (though it could say something else), and a search bar. That drop down menu in-between the publish button and the search bar is what you're looking for. Click that drop down menu and select "Interactive PDF".
Once selected, the panels on the right side of your screen will change to look more like this:
3 | Add Hyperlinks to your Interactive PDF
Adding hyperlinks to your document will allow you to add clickable text, frames, or graphics that will link to somewhere or something else. They’re most commonly used to link to outside URL’s but they can link to all kinds of things!
Here’s a list of what hyperlinks can link to:
Website URL
File attachment
Email window (this is like when you click on someone’s contact info online and it opens up your email and creates a new draft with the sender's email in place)
Another page within the PDF
Text anchor (this can move you to another part of the page or document after clicking on it)
Shared destination (a destination from any other InDesign document)
Now let’s insert some hyperlinks! Here’s how:
Open the Hyperlinks panel.
2. With the words highlighted or the graphic selected, you’ll click on the “new” button that looks like a piece of paper with the corner folded up in the bottom of the Hyperlinks window.
3. Add the URL (or whatever destination – this will depend on the type of hyperlink you’re adding) to the window that pops up. If this is a destination you’ll use again, check the box next to “Shared Hyperlink Destination”. As far as the appearance settings below, I leave “Type" at “Invisible Rectangle” because I don’t want any random rectangles making my designed PDF fugly. I also turn off the highlight option (for the same reasons of avoiding fugliness).
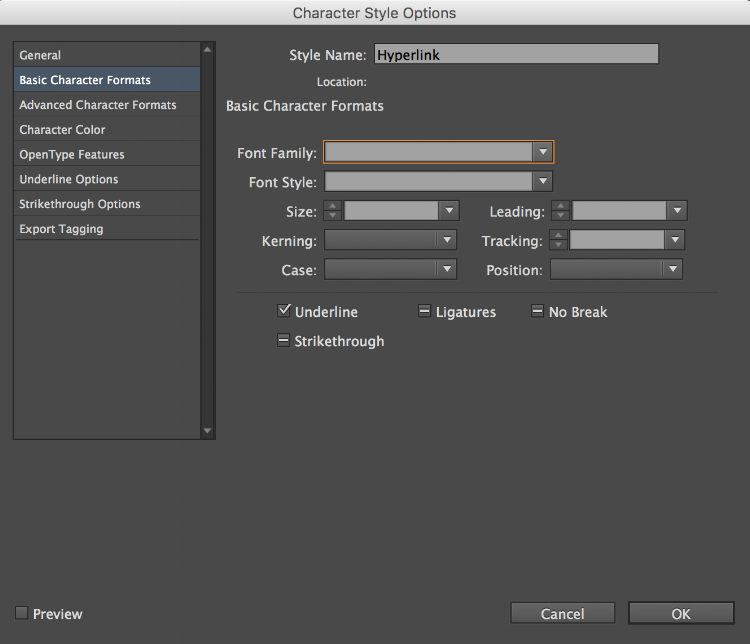
4. If you turn any text into a hyperlink, you can change the appearance of this text by going to the Character Styles menu and double-clicking on the Hyperlink character style from the list. A window will appear where you can change the font, color, weight, etc. for all of your hyperlinks.
4 | Add Buttons and Forms to your Interactive PDF
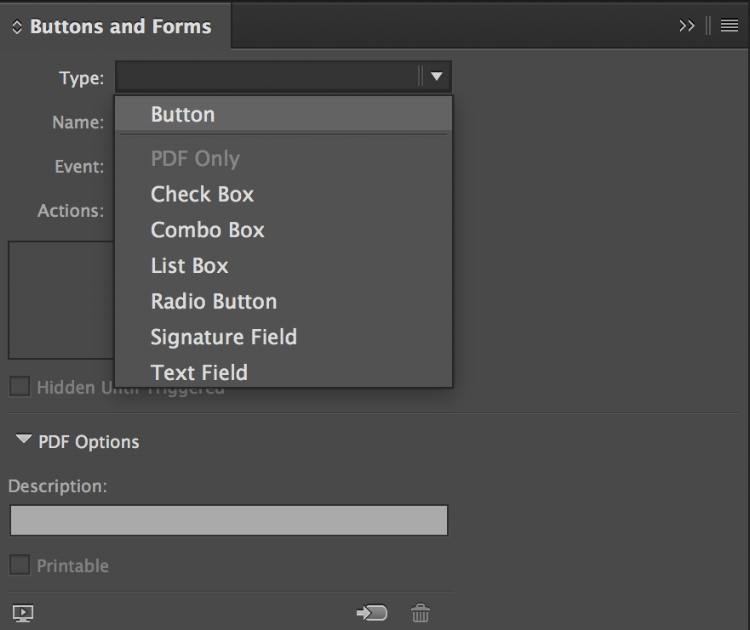
To add buttons and forms to your interactive PDF, you’ll need to select the panel that says Buttons and Forms (imagine that).
Buttons
1. To add a button to your InDesign document, first select the graphic that you want to convert into a button.
2. With the button and forms menu already open, click the drop-down menu and select “Button”. This will convert the selected graphic into a button.
3. Next, change the event – or action needs to happen in order to activate the button. I like to keep it on the default “On Release or Tap” but whatever you choose is up to you.
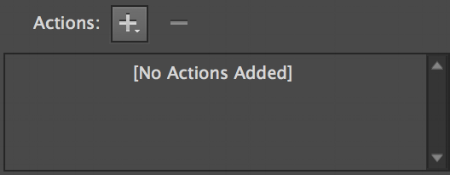
4. In order for the button to do anything, you need to add an action. Do this by clicking on the plus sign on the buttons panel and choose what you want your button to do.
5. Once your button has an action, you can now either leave the button as is, or you can add a rollover appearance and a click appearance.
With your new button selected, click on “[Rollover]”. With Rollover selected, change the appearance of your the actual graphic by editing it on your InDesign page.
Repeat this step with the "[Click]” option selected.
Toggle these options on and off by clicking the eyes next to them.
Check Box
Adding an interactive checkbox to your InDesign doc is super easy.
Select the box you want to convert into a checkbox.
Open the Buttons and Forms panel.
Click the "Type" drop-down menu and choose Check Box.
Boom! You’re done!
Combo Box
If you’re wondering what the heck a combo box is, you’re not alone – I actually just Googled it myself. Apparently, a combo box is a drop-down menu – so that's a super handy feature to be able to have in your interactive PDF’s!
Here’s how you set up a combo box in your interactive PDF:
Select the box you want to be transformed into a combo box with the Buttons and Forms panel open.
Click the "Type" drop-down menu and choose Combo Box.
Add a description if you want (this is totally optional).
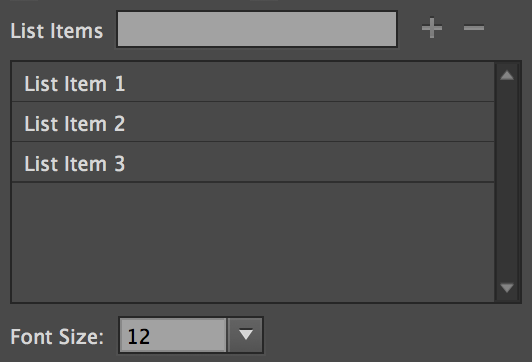
Add options to your list by typing them into the List Items field and pressing enter after you’ve finished typing each one.
If you want, you can change the font size of the list items at the bottom of the window.
List Box
A list box is a different layout of the combo box, where instead of a drop down menu, the list is visible in a scrollable box. From here, users can just highlight the option they want to be selected from the list displayed.
You set these up in the exact same way you set up a Combo Box (above).
Radio Button
Radio buttons are typically used when multiple items may need to be selected from a question or category. This button is set up much in the same way that a check box is, in which you would need to place the actual button next to information that is already typed out in your InDesign document (rather than adding them in the button panel like you do with the list and combo box).
These are set up exactly the same as the check boxes (above).
Signature Field
This field is a place for users to electronically draw their signature into the document.
All you need to do to set this up is to select the box you want to be converted, open the Buttons and Forms field and select Signature Field.
Text Field
Last but not least, and probably the most useful of the bunch, is an editable text field. A text field allows users to type into the designated spaces of the interactive PDF right from their computer.
This is a super easy field to set up. Here’s how:
Select the box you want to transform into a text field while the Buttons and Forms panel is already open.
From the drop-down menu, choose Text Field.
Check Multiline and Scrollable from the checkboxes at the bottom of the window (this isn’t necessary, but is typically ideal).
That’s it!
4 | Add Bookmarks
Bookmarks make it easy for anyone viewing your PDF in Adobe Reader or Adobe Acrobat to jump around the document. The bookmarks appear in a list on the left side of the window in Reader or Acrobat and when clicked will take you to different destinations within the PDF. They almost act as a table of contents for your interactive PDF’s. This can be especially helpful for super long documents like ebooks.
Here’s how you set them up:
Open the Bookmarks panel.
Highlight the text you want your bookmark to jump to.
Click on the “new” icon on the bottom corner of the window (the piece of paper with the bent up corner icon).
Your new bookmark will appear in the window where you can then change it’s name to whatever you want.
Create nested bookmarks by clicking on the established bookmark you want the new one to be nested below before creating the new one.
Important things to consider when putting together your Interactive PDF In InDesign
The crappy part about these interactive PDFs is that several of these features don’t work in programs other than Adobe Reader, Adobe Acrobat and sometimes the internet. Luckily, these are typically the norm, but they’re still not the only ways to read or view PDFs. Believe me, I’ve learned this the hard way!
Here’s a good workaround – if you’re unsure of what platform your PDFs will be read in, stick to using only the hyperlinks panel. The hyperlinks panel has the only interactive elements that will work across the board. You are still able to do almost everything you need with the hyperlinks panel, although you will sadly forgo the bells and whistles of the Buttons and Forms panel. From my experience, the majority of the features from the Buttons and Forms panel disappear when you’re using a program outside Adobe Acrobat or Reader. Which totally sucks by the way.
So if you need to play it safe, stick to just hyperlinks.
Note that text fields don’t actually disappear when your PDF is opened in another program, but they're no longer fillabe. So definitely still include those, but know that they will only be fillable for those who use the appropriate programs.
Saving Out your Interactive PDF
Once you've added all of your interactive elements, it's time to save!
All that's left is to go to File > Export > and choose "Adobe PDF (Interactive)" from the file type drop-down menu. Then click save.
When the InDesign window pops up, you shouldn't need to change any of the export settings, so you can go ahead and click Export.
And you're done!
Whew! I know that was a lot of information thrown at you all at once, but I hope it helps! Let me know in the comments below what types of interactive PDF’s you’re making!

