
The Complete Guide to Adobe Illustrator Tools – Pt. 1
Alright, y’all – today begins the first of our two-part series where I give you an overview of EVERY SINGLE Adobe Illustrator tool. Whether you’re a total newbie to Illustrator or you’ve used it millions of times, you’ll find this guide to be super helpful! Even I learned of a few new tools while putting this post together.
The thing about Adobe Illustrator is that there's typically more than one way to accomplish the same task. Just because you know how to do something one way, doesn’t mean it’s the easiest or most straightforward way of going about it. With that being said, some of these tools offer super short cuts to processes you may already have a system for, while others will probably yield a similar amount of time and effort to accomplish the same end goal. Either way, this guide is a quick and easy overview of what each Adobe Illustrator tool does and its general uses.


Also, note that not every Adobe Illustrator tool is super relevant or useful (at least in my mind). So understand that mastering every single one of these tools is totally not necessary. There are several Illustrator tools that you will probably never touch once in your whole graphic designer life. So if at any point while you’re going through this list, it seems like an Illustrator tool is extremely specific and realistically something you’ll never use – you’re probably right. But just in case, I’ve laid them all out for you anyway!
Because there are SO many Adobe Illustrator tools, I’ve split this post into two parts, starting with the top half of the Illustrator toolbar, ending with the bottom. So below are the top half of the Adobe Illustrator tools (which you can find in the toolbar on the left-hand side of your workspace):

Selection Tool (V)
The selection tool is the black arrow icon that you use all the time. It functions as a typical cursor, allowing you to select, click and drag objects and text around your screen.
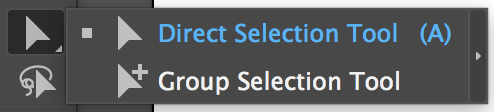
Direct Selection Tool (A)
The direct selection tool allows you to individually select and edit specific anchor points of vector shapes or lines.
Where the regular selection tool would select the entire shape, the Direct Selection Tool enables you to edit one angle, side, point or curve at a time.
- Group Selection Tool
This tool allows you to easily select a specific object within a group in order to move, edit, or resize it individually.
I actually didn’t even realize this was a real tool until today, but I’m super glad it exists because this will save me a lot of time and eliminate the need for a million double clicks (which accomplishes the same thing but takes a lot longer)!

Magic Wand Tool (Y)
This tool allows you to click on a single object in order to automatically select everything in your workspace with that same fill color.
This would come in handy if you ever needed to adjust the same color on a bajillion different shapes. By using the magic wand tool you only have to click once to do so, instead of clicking on every object individually!

Lasso Tool (Q)
The lasso tool works similarly to the Direct Selection Tool in that it allows you to select individual anchor points within a shape or object. However, the Lasso Tool allows you to draw around an area of points you want selected so that you’re able to easily select several at a time.
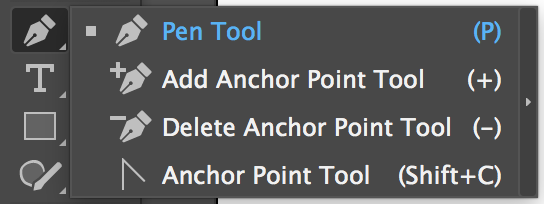
Pen Tool (P)
The pen tool is probably the most important tool of the entire program. This Illustrator tool allows you to click in your workspace to create anchor points. By clicking and dragging these anchor points, you can maneuver their “handles”, which give your paths curvature and shape. By connecting several anchor points with this tool, you can create unique, hand drawn vector shapes.
This tool takes some practice, but once you have it down, you will be able to draw freaking awesome vector illustrations. I use the pen tool every single time I open Illustrator, so if there is any tool to master, it’s definitely this one!
- Add Anchor Point Tool (+)
The add actor point tool allows you to click in the middle of an existing path to add an extra anchor point to your shape or line.
You would use this tool if you needed to add an extra curve or angle to your shape, without having to fully redraw it. Once you’ve added the new anchor point to your path, use the direct selection tool and/or the anchor point tool to manipulate it into the curve or angle you want to create.
- Delete Anchor Point Tool (-)
The delete anchor point tool deletes anchor points from paths (pretty self-explanatory, I know).
- Anchor Point Tool
This tool allows you to add or maneuver handles of existing anchor points in order to add curvature to shapes you’ve already created.

Curvature Tool (Shift+)
The curvature tool is another great way to create vector shapes, especially if your shape has mostly curved edges.
It's harder to have perfect control over your curves using this tool than is with the pen tool, BUT the curves of this tool are also more perfectly round than the curves you would create using the pen tool. I suggest using this tool in combination with the pen tool to create the perfect shape – best of both worlds!

Type Tool (T)
This tool allows you to add text to your Illustrator document.
To use this tool, either click on your artboard and begin typing – which allows you to type without any boundaries; or you can click and drag to create a text box and THEN begin typing – which will restrict your text to stay within that text box.
- Area Type Tool
The area type tool allows you to convert an existing shape into a text box and type within it.
- Type on a Path Tool
This tool allows you to use an existing line or shape as a path to type on.
- Vertical Type Tool
The vertical type tool allows you to type your text vertically instead of horizontally.
- Vertical Area Type Tool
This is exactly like the area type tool, but this tool allows you to type vertically instead of horizontally.
- Vertical Type on a Path Tool
This tool is exactly like the type on a path tool, but allows you to type vertically instead of horizontally.
- Touch Type Tool
This it allows you to select individual letters of existing text and move them around.

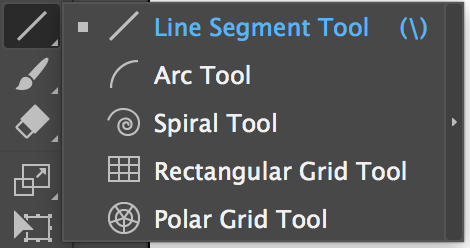
Line Segment Tool (\)
This tool does exactly what you think it does – draws lines! Unlike the pen tool however, you cannot make connected lines, only individual ones.
For this tool and the ones nested under it, you can either click and drag to create your lines, or you can click one single time on the artboard and specify it's dimensions first. If you hold down the shift key you can create a line at a 0, 45, or 90 degree angles.
- Arch Tool
This tool makes arches – imagine that! However, I personally don’t find it the easiest to control and would recommend using the curvature tool instead – but try them both out and see which you prefer!
- Spiral Tool
Another obvious one – this tool makes spirals! This is actually a super fun tool, however I don’t know that I’ve actually ever used it for a real project before. But if you can find a practical use for this – kudos!
- Rectangular Grid Tool
This tool is actually be super helpful because it allows you to create create tables or anything else you’d need a grid with rows and columns for.
Once the tool is selected, you can click one time on your artboard, which will bring up a window where you can specify the size and amount of rows and columns you want. Hit okay and your grid will appear!
- Polar Grid Tool
This tool makes a polar grid, which apparently is a circular target looking thing, with perpendicular lines that meet in the middle. I have no idea what you would ever use this for, but it’s there if you need it I guess?!
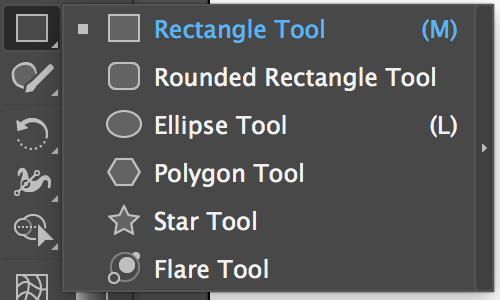
Rectangle Tool (M)
This tool makes squares and rectangles.
If you want a perfect square you can hold down the shift key as you click and drag. Otherwise just click and drag normally to make a rectangle. If you need your shape to be an exact size, just click one time and specify the size you want your shape to be in the box that will pop up.
- Rounded Rectangle Tool
This tool works exactly the same as the rectangle tool, but the corners are rounded instead of squared.
If you want to adjust the roundness of the corners, use the direct selection tool and click and drag on the little circular points that show up on the insides part of the corners and adjust them accordingly.
- Ellipse Tool (L)
Fun fact: an ellipse is a circle. So any time you want a circle or an oval, this is the tool you’ll need.
To create a circle, hold down the shift key. If you want an oval, just click and drag. Like the rectangle tool(s), if you want a specific sized circle, just click once on the artboard and adjust your settings accordingly.
- Polygon Tool
The polygon tool makes any number of sided shapes – from triangles to hexagons to octagons and beyond.
With the tool selected, all you need to do is click once on your artboard and define how many sides you want your shape to have.
- Star Tool
This tool obviously makes stars. With this tool, you can choose how many points you want your star to have, as well as how far in the inner points go towards the center.
The star tool is super fun to play around with, given how many different variations you can come up with. Again, just click in your workspace with the tool selected to define the number of points you want your star to have, as well as the distance you want between them.
-Flare Tool
This is another random tool that I have never actually used and I don’t totally understand who does. It makes this weird multi-circular shape with some weird gradient flares. Play around with it because I don’t even really know how to describe what this tool does. You’ll see how weird it is for yourself.

Paint Brush Tool (B)
The paint brush tool makes thicker, paint-like strokes that you can change the width, shape and texture of.
This tool creates brush strokes that are made up of actual lines, so after you’ve “painted” them, you can use the direct select tool to can move around the points and smooth out any curves that aren’t quite perfect. You can also change the width of the stroke after it’s already been drawn by changing the line weight.
- Blob Brush Tool
The blob brush tool is the same as the paint brush tool, but instead of creating lines down the middle of your brushstrokes, it creates a vector shape AROUND the brushstroke. So instead of creating a single path, it creates an entire an area instead.

Shaper Tool (Shift+N)
The shaper tool allows you to draw general shapes by hand, but then will automatically clean them up and create the shape you intended. So if you used this tool to draw a super crappy rectangle, the moment you release your finger from the mouse pad, it will automatically create a non-crappy rectangle for you.
- Pencil Tool
The pencil tool is similar to the brush tool in that you can draw lines by hand without using the pen or line tools. I don’t use it often because it can be difficult to handle precisely, but occasionally it comes in handy!
- Smooth Tool
This tool smooths out lines, making them less rigid and bumpy.
By clicking and dragging the smooth tool over top of a line you’ve drawn, it will automatically change around the anchor points to create a smoother transition between them. I personally don’t find this tool to work super well, but it’s always worth a shot!
- Path Eraser Tool
With a line selected, you can use the path eraser tool to draw along segments of the line you want to be erased.
- Join Tool
The join tool allows you to take two paths and join them together to create one single path. With the join tool selected, just click and drag a circle around the two end points of the path you want to be connected, and Illustrator will join them together for you.

Eraser Tool (Shift+E)
The eraser tool… erases. I know, shocking, right? This tool really does come in handy if you want to get rid of a section of a vector object or path.
Unlike the path eraser tool, this tool can erase entire sections of shapes, causing your vector shape to redraw its outside bounding lines.
- Scissors Tool
The scissors tool can be used to cut apart a vector object or path.
If you want to slice apart an object, use the scissors tool to click on one side and then click on the other. Now your shape is cut into two pieces which you can move around individually. You can also use this tool on a path by clicking once on the section of the path you want to be separated.
- Knife Tool
The knife tool allows you to do the same thing as the scissors tool, but instead of only cutting straight lines, the knife tool can cut in any jigsaw manner you want! Just click and drag the knife through the shape and voila!

Rotate Tool (R)
The rotate tool allows you to rotate shapes in a circular manner.
To use it, select the tool and click once in the middle of the shape, defining your axis point (that blue dot) of which you want your shape to rotate around. Then click and drag outside of the shape to rotate it around!
- Reflect Tool (O)
The reflect tool works similarly to the rotate tool, but instead reflects the image or object instead of just rotating it.
Again, you need to select an axis point, then click and drag outside of the shape to reflect it.

Scale Tool (S)
This tool works similarly to the reflect and rotate tools, in that you have to define an axis point, then resize by clicking and dragging outside the shape. I find it easier to forgo using this tool by just resizing the shape as normal while holding down option and shift (which resizes it proportionately and centered to where the object already resides).. But to each it's own!
- Shear Tool
The shear tool angles and skews your objects to look like they are going back into space. This tool works the same as the previous, where you select and axis point, then click and drag outside of the shape to shear it.
- Reshape Tool
The reshape tool allows you to select multiple anchor points on a line or shape, and move them all in the same direction.
It’s essentially the same as the direct selection tool but is easier in maneuvering several points at the same time, especially if you want them all to move in the same direction.
Whew! That’s a lot of tools. But guess what? That’s only HALF!
Read Part Two HERE!


